

Halloween Oreo Truffles

This post may contain affiliate links. If you purchase through them, we may earn a small commission at no extra cost to you. Thank you for supporting our site.
There’s a point every October where my kitchen counter turns into a full-blown truffle assembly line — cookie crumbs everywhere, a double boiler of melting chocolate, and my kids arguing over who gets to add the orange sprinkles. That’s when I know Halloween season has officially started.
Halloween Oreo truffles are one of those recipes I come back to every single year, not because they’re fancy, but because they’re foolproof. No oven, no candy thermometer, no stress. Just crushed Oreos, cream cheese, and melted chocolate rolled into little bites that disappear from the tray faster than I can refill it.
If you’ve never made Oreo truffles before, you’re going to be surprised at how simple this is. And if you’re a longtime Oreo ball fan, this Halloween version adds just enough seasonal flair — orange and black candy melts, spooky sprinkles, spiderweb drizzles — to make it feel like a proper holiday treat without adding real difficulty.
By the end of this post, you’ll know exactly how to make them, how to keep them from cracking when you dip them, how to store them so they stay fresh for your Halloween party, and a handful of ways to switch up the recipe depending on who you’re feeding.
Quick Recipe Facts
| Detail | Info |
|---|---|
| Prep Time | 25 minutes |
| Chill Time | 1 hour |
| Freeze Time | 15 minutes (optional, for dipping) |
| Cook Time | 0 minutes (no-bake) |
| Total Time | About 1 hour 40 minutes |
| Servings | 24 truffles |
| Cuisine | American |
| Course | Dessert / Snack |
| Difficulty | Easy |
| Calories | 145 per truffle |
| Protein | 2g |
| Carbs | 15g |
| Fat | 9g |
Table of Contents
- Why You’ll Love This Recipe
- Ingredient Guide
- Equipment Guide
- Step-by-Step Instructions
- Expert Tips
- Common Mistakes
- Recipe Variations
- Serving Ideas
- Storage
- Troubleshooting
- Frequently Asked Questions
- Tools I Recommend
- Recipe Card
Jump to Recipe — scroll to the bottom for the printable card.
Why You’ll Love This Recipe
Halloween Oreo truffles hit that sweet spot between “impressive enough for a party” and “easy enough to make with kids climbing on your kitchen stool.” Here’s why they’ve become a permanent fixture on my October baking list.
Who it’s for: Busy parents who need a no-bake Halloween dessert, beginner bakers who want a recipe that’s genuinely hard to mess up, and anyone hosting a party who needs something that travels well.
Flavor: Rich, chocolatey, and slightly tangy from the cream cheese, which keeps the sweetness from feeling one-note.
Texture: Dense and fudgy on the inside, with a thin, snappy chocolate shell on the outside.
Nutrition: These are a treat, not a health food, but portion control is built in since each truffle is naturally bite-sized.
Convenience: No oven, no mixer required (though it helps), and the whole process from start to finish takes under two hours, most of which is hands-off chilling.
Meal prep advantages: Oreo truffles freeze beautifully, which means you can make them weeks ahead of your Halloween party and just pull them out the day before. If you’re building out a whole fall snack rotation, they pair nicely with something like Pumpkin Spice Energy Balls, another no-bake, make-ahead treat that keeps well in the freezer.
Ingredient Guide
Every ingredient here is doing a job. Here’s what you need to know before you shop.
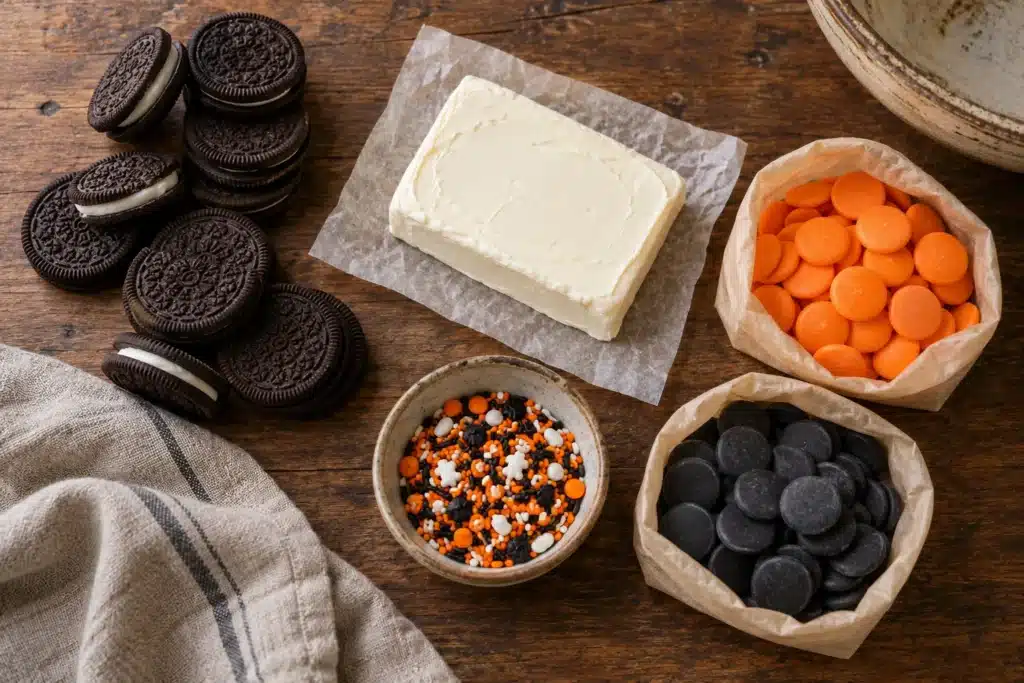
Regular Oreo cookies (36 cookies, cream filling included). The filling matters — don’t scrape it out. It’s what gives the truffle filling its fudgy texture and helps bind everything together. Regular Oreos work best; Double Stuf can make the filling too soft to roll cleanly.
Full-fat block cream cheese (8 oz, softened). This is the binder. Use block cream cheese, not the spreadable tub kind, which has more air and moisture whipped in and will make your filling too loose. Let it soften at room temperature for about 30 minutes before mixing.
Chocolate melting wafers or candy melts (24 oz, split between dark/milk chocolate and orange/black for decorating). Candy melts are formulated to set up firm and glossy without tempering, which makes them far more forgiving than regular chocolate bars for dipping. If you prefer real chocolate, add a teaspoon of coconut oil per cup to help it flow.
Sprinkles, mini candy eyes, or a contrasting drizzle color for decoration. Purely for fun and Pinterest-worthiness — skip if you’re short on time.
Shopping tip: Buy your Oreos and candy melts a few weeks ahead. Halloween-specific colors like orange and black candy melts tend to sell out fast in early October.
Storage tip for leftover ingredients: Leftover cream cheese should go straight back in the fridge; leftover candy melts store fine in a cool, dry pantry for months.
Substitutions: Gluten-free Oreo-style cookies work in a 1:1 swap. Dairy-free cream cheese and dairy-free chocolate chips also substitute cleanly for a dairy-free version.
Equipment Guide
You don’t need much, but a few tools make this significantly easier.
Food processor. Gets the Oreos into fine, even crumbs in seconds. Budget alternative: a zip-top bag and a rolling pin, though the crumbs will be less uniform.
Stand mixer or hand mixer. Makes combining the Oreo crumbs and cream cheese much faster. Budget alternative: a sturdy spoon and some elbow grease — it just takes a bit longer to get fully smooth.
Baking sheet with parchment paper. For chilling and setting the Halloween Oreo truffles without sticking.
Cookie scoop (1-tablespoon size). Keeps every truffle the same size, which matters for even dipping and a professional look. Budget alternative: a regular tablespoon measure.
Microwave-safe bowls or a double boiler. For melting the candy melts smoothly without scorching.
Fork or dipping tool. Makes coating each truffle in chocolate much cleaner than trying to do it with your fingers.
Step-by-Step Instructions
Step 1: Crush the Oreos into fine crumbs
Add the whole Oreo cookies (cream and all) to a food processor and pulse until you get fine, sand-like crumbs. Why it matters: larger chunks will make the filling harder to roll and more likely to crack when dipped. Look for a texture with no visible cookie pieces left. Common mistake: stopping too early, which leaves gritty crumbs that won’t bind well. Expert tip: save a tablespoon of crumbs to sprinkle on top of the finished truffles for garnish.
Step 2: Combine crumbs with cream cheese
In a large bowl, beat the Oreo crumbs and softened cream cheese together until fully combined. Why it matters: the cream cheese needs to coat every crumb evenly, or you’ll get dry pockets. What to look for: a thick, uniform, fudgy-looking dough that holds together when pressed. Timing: about 2–3 minutes on medium speed. Texture cue: it should feel like a firm cookie dough, not sticky or runny.
Step 3: Roll into balls
Using a 1-tablespoon cookie scoop, portion the mixture and roll each piece between your palms into a smooth ball. Why it matters: uniform size means even chilling and even dipping later. Common mistake: rolling with warm hands, which softens the mixture too much — dip your hands in cool water if it starts sticking. Visual cue: smooth, crack-free surface.
Step 4: Chill
Place the rolled balls on a parchment-lined baking sheet and refrigerate for at least 1 hour, or freeze for 15 minutes if you’re short on time. Why it matters: a firm center is essential for clean dipping — a soft truffle will fall apart in the melted chocolate. What to look for: the balls should feel firm to the touch, not squishy.
Step 5: Melt the chocolate
Melt your candy melts in the microwave in 30-second bursts, stirring between each, until smooth and pourable. Why it matters: overheating causes chocolate to seize and turn grainy. What to look for: a glossy, ribbon-like consistency. Common mistake: microwaving too long in one go — always stir frequently.
Step 6: Dip the Halloween Oreo truffles
Drop a chilled truffle into the melted chocolate, use a fork to coat it completely, then lift and tap gently against the bowl to remove excess. Why it matters: a thin, even shell sets better and looks cleaner than a thick, drippy one. Expert tip: work in small batches, keeping the rest of the truffles chilled while you dip.
Step 7: Decorate immediately
While the coating is still wet, add sprinkles, candy eyes, or a contrasting drizzle. Why it matters: chocolate sets fast, so decorations need to go on within seconds of dipping. Visual cue: sprinkles should sit on top, not slide off.
Step 8: Set and serve
Let the dipped Halloween Oreo truffles sit at room temperature or in the fridge until the shell is fully hardened, about 15–20 minutes. Texture cue: tap gently — it should sound and feel solid, not tacky.
Expert Tips
- Keep a second bowl of warm water nearby to dip your fork into between truffles — it keeps the chocolate from building up and getting clumpy on the tines.
- For a bakery-style finish, use a thin drizzle of contrasting candy melt across the top instead of dumping sprinkles everywhere.
- If your kitchen is warm, work in smaller batches and keep the undipped truffles in the fridge until you’re ready for them.
- A toothpick dipped in melted chocolate is a precise little tool for drawing spiderweb designs or tiny ghost faces.
Common Mistakes
| Problem | Cause | Solution |
|---|---|---|
| Halloween Oreo truffles crack when dipped | Filling wasn’t chilled long enough | Chill for a full hour, or freeze for 15 minutes before dipping |
| Chocolate coating is thick and clumpy | Chocolate overheated or seized | Melt in short bursts and stir constantly; add a bit of coconut oil to loosen it |
| Filling is too soft to roll | Cream cheese was too warm or over-softened | Use cold cream cheese straight from the fridge, or chill the mixed dough for 10 minutes first |
| Sprinkles slide off | Decorated too late, after chocolate started setting | Add decorations within seconds of dipping |
| Halloween Oreo truffles taste gritty | Oreos weren’t crushed finely enough | Process until the crumbs resemble fine sand, with no visible chunks |
Recipe Variations
Healthy version: Swap in reduced-fat cream cheese and use dark chocolate for a slightly less sweet result.
High protein: Mix in a scoop of vanilla protein powder along with the Oreo crumbs, adjusting cream cheese slightly if the dough gets too dry.
Low sugar: Use sugar-free chocolate-style baking wafers and a reduced-sugar sandwich cookie.
Keto: Use a keto-friendly chocolate sandwich cookie alternative and sugar-free chocolate coating.
Gluten free: Use a gluten-free chocolate sandwich cookie in place of regular Oreos.
Dairy free: Use dairy-free cream cheese and dairy-free chocolate melts.
Seasonal: Swap orange and black for pastel candy melts at Easter, or red and green at Christmas — same base recipe, different holiday.
Holiday (Halloween specific): Roll some truffles in crushed Oreo crumbs instead of dipping for a “dirt ball” look, or shape flattened rounds and pipe on simple ghost faces.
Kid friendly: Let kids handle the rolling and sprinkle-decorating steps — it’s genuinely a great activity for small hands.
Party version: Double the batch and set up a “truffle decorating station” with bowls of different sprinkles for guests.
Budget version: Use one bag of standard chocolate chips instead of specialty candy melts.
Luxury version: Use a high-quality dark chocolate and finish with a light dusting of edible gold or copper shimmer for a more elevated look.
If you love this kind of quick, no-fuss fall baking, you’ll probably also enjoy Apple Cinnamon Oatmeal Bars, a cozy, cinnamon-spiced treat that comes together nearly as fast as these truffles do.
Serving Ideas
- Dessert table: Arrange on a tiered stand for a Halloween party centerpiece.
- Meal prep: Make a big batch and freeze individual portions for grab-and-go treats through the season.
- Potluck: Pack in a single layer in a lidded container so the coating doesn’t get scratched in transit. For another potluck-friendly fall favorite, Apple Cinnamon Cheesecake Dip travels just as well and disappears just as fast.
- Game day: Set out alongside other finger foods for easy, no-fork-needed snacking.
- Thanksgiving or Christmas: Swap the Halloween decorating colors for the season and reuse the same base recipe. Setting out a dessert spread for the holidays? Easy Pumpkin Cheesecake Dip is another ready-in-minutes option that rounds out the table nicely.
- Bridal or baby shower: Dip in white candy melts and finish with delicate sprinkles for a dressier presentation.
- Picnic or BBQ: These travel well in a cooler since the chocolate shell holds up in moderate temperatures.
- Summer parties: Keep chilled until serving, since the coating softens faster in heat.
Storage
| Method | Guidance |
|---|---|
| Counter | Not recommended for more than 1–2 hours due to the cream cheese filling |
| Refrigerator | Store in an airtight container for up to 1 week |
| Freezer | Freeze in a single layer, then transfer to a freezer bag for up to 2 months |
| Reheating | Not applicable — serve chilled or at cool room temperature |
| Meal Prep | Freeze undipped truffle balls ahead of time, then thaw slightly and dip fresh chocolate on serving day |
| Shelf Life | Best quality within the first week when refrigerated |
Troubleshooting
My Halloween Oreo truffles are falling apart when I try to dip them. The filling likely wasn’t cold enough. Pop the tray back in the freezer for 10 minutes and try again.
The chocolate coating looks dull instead of glossy. This usually means the chocolate overheated slightly. Try melting a fresh batch at a lower power setting, stirring more frequently.
My Halloween Oreo truffles taste too sweet. Use a darker chocolate for coating, which balances the sweetness of the Oreo filling nicely.
The filling is sticking to my hands too much while rolling. Chill the mixed dough for 10–15 minutes before rolling, and keep your hands lightly damp with cool water.
Frequently Asked Questions
What are Halloween Oreo truffles made of? They’re made from crushed Oreo cookies, softened cream cheese, and a chocolate coating, decorated with Halloween-themed sprinkles or candy melts.
Do I need to bake Oreo truffles? No baking is required. This is a completely no-bake recipe that only needs chilling time.
How far in advance can I make Oreo truffles for Halloween? You can make them up to two months ahead if frozen, or about a week ahead if kept refrigerated.
Can I freeze Oreo truffles? Yes. Freeze them in a single layer until solid, then transfer to a freezer bag for longer storage.
Why did my Oreo truffles crack when I dipped them? This usually happens when the filling isn’t cold enough before dipping. Chill or freeze until firm.
Can I use Double Stuf Oreos instead of regular? You can, but the filling may turn out softer and stickier, making it harder to roll cleanly.
What chocolate is best for dipping Oreo truffles? Candy melts or melting wafers are easiest for beginners since they set up glossy without needing to be tempered.
Are Oreo truffles gluten free? Not with regular Oreos, but gluten-free sandwich cookies make an easy substitute.
Can I make these dairy free? Yes, by using dairy-free cream cheese and dairy-free chocolate.
How long do Oreo truffles last in the fridge? Up to one week when stored in an airtight container.
Can kids help make this recipe? Yes, rolling the balls and adding sprinkles are both great tasks for kids to help with.
What’s the best way to decorate them for Halloween? Orange and black candy melts, spiderweb drizzles, and candy eyes are all easy, effective options.
Can I make a big batch for a party? Yes, the recipe doubles or triples easily since it’s just a ratio of cookies to cream cheese.
Do Oreo truffles need to be refrigerated before serving? They should be chilled until the chocolate coating fully sets, but can sit out for a short time during serving.
Can I use white chocolate instead of dark chocolate? Yes, white chocolate or white candy melts work well and can be tinted for Halloween colors.
Tools I Recommend
A few tools genuinely make this recipe easier. Here’s what I actually reach for, based on what’s worked well in my own kitchen. Some of the links below are affiliate links, meaning I may earn a small commission at no extra cost to you if you choose to purchase.
Food processor Best for: turning Oreos into fine, even crumbs in seconds. Why it helps: uniform crumbs mean a smoother, easier-to-roll filling. Key features: multiple speed settings, large capacity bowl. Buying considerations: a mini or compact model is plenty for this recipe size.
Cookie scoop set Best for: portioning Halloween Oreo truffles evenly. Why it helps: consistent size means consistent chilling and dipping. Key features: spring-loaded release, multiple sizes in one set. Buying considerations: look for stainless steel for durability.
Candy melting wafers Best for: an easy, tempering-free chocolate coating. Why it helps: melts smoothly and sets with a glossy finish. Key features: available in seasonal colors like orange and black. Buying considerations: check the ingredient list if avoiding certain allergens.
Dipping tool set Best for: cleanly coating Halloween Oreo truffles without a mess. Why it helps: designed specifically to lift and drain excess chocolate. Key features: multiple fork and spoon-shaped tips. Buying considerations: dishwasher-safe options save cleanup time.
Halloween sprinkle mix Best for: fast, festive decoration. Why it helps: takes the guesswork out of color coordination. Key features: mix of shapes and colors themed for the season. Buying considerations: check for allergen-free options if needed.
Parchment paper Best for: easy release when chilling and setting Halloween Oreo truffles. Why it helps: prevents sticking without needing extra grease or spray. Key features: pre-cut sheets save time versus a full roll. Buying considerations: unbleached options are widely available.
Airtight storage containers Best for: keeping Halloween Oreo truffles fresh in the fridge or freezer. Why it helps: protects the chocolate coating from moisture and odors. Key features: stackable, freezer-safe designs. Buying considerations: look for a size that allows a single layer to avoid scratching the coating.
Stand mixer Best for: quickly combining cream cheese and Oreo crumbs. Why it helps: saves significant hand-mixing effort, especially for double batches. Key features: multiple attachments, various bowl capacities. Buying considerations: a hand mixer is a perfectly good budget alternative for this recipe.
Recipe Card
Halloween Oreo Truffles
No-bake, four-ingredient Halloween Oreo truffles with a crisp chocolate shell and a fudgy, creamy center. Ready in under two hours, mostly hands-off.
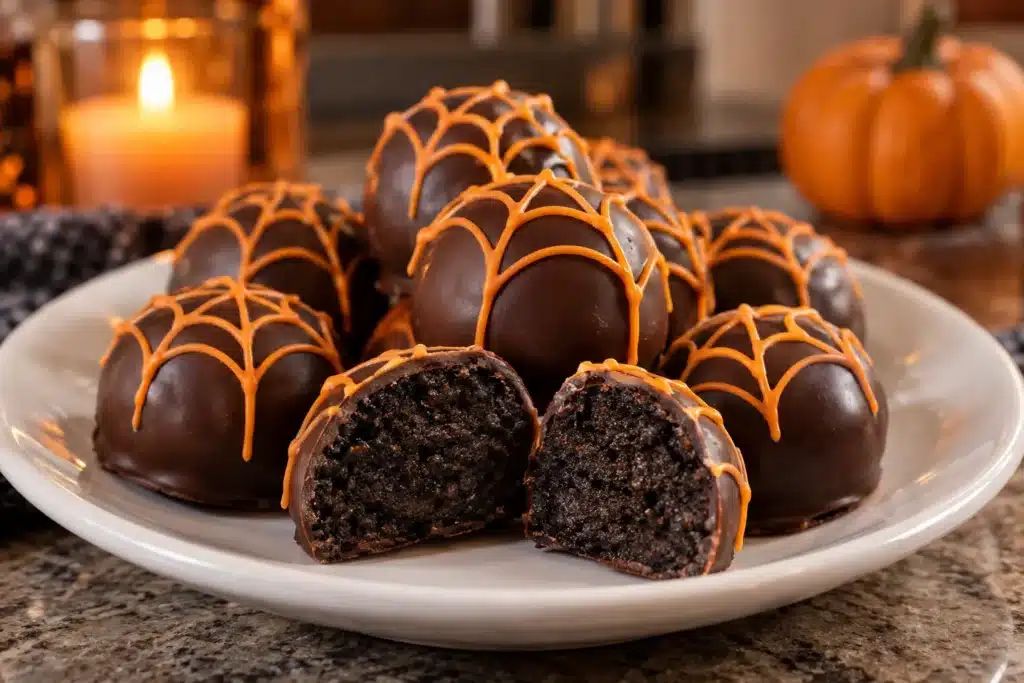
Prep Time: 25 minutes | Chill Time: 1 hour | Total Time: 1 hour 40 minutes | Servings: 24 truffles
Ingredients
- 36 regular Oreo cookies
- 8 oz block cream cheese, softened
- 16 oz chocolate candy melts (dark or milk)
- 8 oz orange and black candy melts, for decorating
- Halloween sprinkles, candy eyes, or drizzle, for garnish
Instructions
- Crush the Oreo cookies in a food processor until they form fine crumbs.
- Beat the Oreo crumbs and softened cream cheese together until fully combined and fudgy.
- Scoop and roll the mixture into 1-tablespoon balls; place on a parchment-lined baking sheet.
- Chill for at least 1 hour, or freeze for 15 minutes.
- Melt the candy melts in 30-second microwave bursts, stirring often, until smooth.
- Dip each chilled truffle in the melted chocolate, tapping off excess.
- Decorate immediately with sprinkles or a contrasting drizzle.
- Let set for 15–20 minutes before serving.
Notes
- Keep undipped Halloween Oreo truffles chilled while working in batches to prevent cracking.
- Candy melts are more forgiving than real chocolate bars since they don’t require tempering.
- These freeze well for up to two months.
Nutrition (per truffle)
| Nutrient | Amount |
|---|---|
| Calories | 145 |
| Protein | 2g |
| Carbohydrates | 15g |
| Fat | 9g |
Scaling Options
- Half batch: 18 Oreos, 4 oz cream cheese, makes about 12 truffles.
- Double batch: 72 Oreos, 16 oz cream cheese, makes about 48 truffles — ideal for large parties.
2 thoughts on “Halloween Oreo Truffles: 5 Amazing Easy No-Bake Treats”